Sunday, December 2, 2012

Cranberry Scones

I haven't been updating this kitchen journal of mine for quite a looooooong time! Almost a year I must say haha. I still cooked and experimenting new recipes at times but didn't feel like jotting things here. Haha.

Anyways, yesterday I made cranberry scones to satisfy my sudden craving after I saw one at a coffee shop earlier in the morning. With all the tensions I had trying to finish up my research report, all kind of foods seem to look so good to me, so I thought instead of buying them I should try making my own when I get back home later in the evening!


I knew I had some cranberries left from my previous recipe experiment, an oat muffin which of course I didn't write it here, and I think we still have whipping cream and butter and everything else, everything made were from whatever's left in the pantry.

I used the same recipe from http://allrecipes.com/recipe/simple-scones/ with a slight modification. What I like about this this website is they allow conversion from US to metric measurements, since I prefer to know the weight of the ingredients coz I just think it will be more accurate, especially if the butter was called to be measured in cups/tablespoon. Here in Malaysia the butters are in either 250g blocks for salted or 227g (8 ounces) for unsalted. I can't have a grasp of how much is 8 tablespoons of butter, or 1 stick butter cause I'm so used to grams of butter. I can only imagine how much is 1 cup of water and immediately can convert if the recipe calls for 1/2 cup = 125ml.

Ingredients

  • 250g flour (2 cups)
  • 65g sugar (1/3 cups)
  • 1 tsp baking powder
  • 1/4 tsp baking soda
  • 1/2 tsp salt (if using salted butter, reduce the amount of salt to 1/4 or even 1/8 or just omit this)
  • 113g butter (8 tbsp, or 4 ounces) frozen
  • A handful of dried cranberries (or raisins, or blueberries, or whatever berries of preference)
  • 1/2 cup cream
  • 1 egg


Steps
  1. In a large bowl, add flour, sugar, baking powder, baking soda and salt. Mix them all together with a fork until they mixes well.
  2. Cut the cold butter into small cubes and add to the dry ingredients. If the butter seems to melt while cutting, keep them in the freezer for a while. When it's hardened, using hand with plastic glove on, mix it together with the dry ingredients until it forms like coarse meal. (crumbles). Add in the cranberries.
  3. In another smaller bowl, add cream and egg and stir until combined.
  4. Using a fork, add in the cream mixture to the butter and flour mixture and combine. With the plastic glove on, press the batter until they mixes well and forms a ball. It will be sticky at times but after a while it would be okay. I used a spatula to pick up any batter residue on the walls of the bowl.
  5. Turn on the oven to 200 degree Celsius.On a lightly floured surface, pat the batter until it's about 3/4 inch thick and using a round cookie cutter, cut the batter into shape.
  6. Place them on an cooking tray lined with parchment paper 1 inch apart. Bake for 16 or 20 minutes only golden brown. Cool on a rack for 5 minutes and serve it warm.

Well I didn't serve it with raspberry jam or Devonshire cream yet since I think we have enough calories in just a piece of scone. Hahaa.. Enjoy it with your choice of tea~! I chose chamomile with minimal sugar, just because I thought it has this de-stressing agents or whatever... If you're up for a tasteful coffee, this is not the one for you haha.

Monday, December 5, 2011

Wedding Cake Tutorial


Hello... Wah I haven't been updating this journal since weeks ago!

OH well, I haven't manage to try new recipes that's why this blog has been abandoned for quite some time.

I'm just here to bookmark a few wedding cake tutorial. I'm going to make a perhaps 2 tier wedding cake for my dear friend's wedding this January. Her wedding will be held in Terengganu, and I am thinking how on earth am I going to bring my cake to Terengganu. First thought was to bring all the stuffs and bake them there, but I am afraid with the unfamiliarity with the oven which might cause failures whilst baking, I thought of bringing the readily baked cakes, wrap them up in cling wraps and aluminium foil and will proceed with the frosting in Terengganu.

The problem is, I thought of wanting to go there by airplane.. but how am I going to bring the layers of cake in flight? I've called the customer care today and they said we can't bring cake into the cabin. If I were to check in the cakes, they might be damaged, because of course they will just toss our bags here and there. Or can I just put them in my hand luggage? Aish... or should I just go there by bus? The company suggested me to use their cargo service. Aiyark. Of course it will be costly. But nevermind, I might going to try call them and ask what's the price for their cargo. Ah, but I still want to try to bring them by airplane... Thought of getting a cute cake box like those I saw in Robinsons/Isetan and wrap them in bubblewrap bla bla.. haha.

Anyway, useful videos here.


Tuesday, November 8, 2011

Pastry Affair - Pâte a Choux (Trial 1)


The first time I tried Beard Papa I wasn't really impressed. I am not sure why. I wasn't really interested of making cream puffs before, but after I tried the one my friend made during a potluck with my former schoolmates I thought it would be interesting to try making those little cute puffs.

Cream puffs are made from Pâte a Choux (paht-ah-shoo). This choux pastry can be used to make eclair, profiteroles, gnocchi and others. Further reading : - ruhlman ;

So the other day I was in a pate a choux mood for a few days, but I couldn't find a time of making them but I ended up stealing some time in between after breakfast and going to Sg. Buloh to find some gardening stuff with mom, to make the choux pastry. Well I made the first part and continued the second part (piping & baking) after I got back from Sg. Buloh.

I tried making this twice, using 2 different recipes : one included milk, and the other did not.

I basically copied most of the steps from Azelia's Kitchen, with having Michel Roux's recipe as my benchmark.

They have this termed ratio of 1:1:1:1 of water, eggs, butter  and flour from one of the recipes I found whilst googling around. I forgot which one though, but basically, they have 1 cup of everything.

Michel Roux's Pate a Choux 


---------------------------------------------------------------------------------------------------

INGREDIENTS

  • 125ml milk
  • 100g butter, diced
  • ½ tsp salt
  • 1 tsp sugar
  • 150g plain flour
  • 4 medium eggs
  • Eggwash (1 egg beaten with 1 tbsp milk)
--------------------------------------------------------------------------------------------------

Instead of 125 ml milk, I used half milk and half water for the first time. I used just water for the second time.

So the concept of choux pastry is to cook the pastry on the stove before baking them (I call this the first part). So the first thing is to boil the water, butter and salt till they melt, and after that add the flour whilst still on low heat. Remove from eat, let it cool for a while or change to a different bowl and add the eggs one at a time later, stirring hard. Let the choux pastry to cool and then pipe them on a baking sheet. Clearer pictures, steps and explanation can be found at Azelia's Kitchen.


I guess the recipe itself is not as important as the techniques of baking. Either ways, the pastry will taste great, well at least for me!


Azelia's method of baking 

-------------------------------------------------------------------------------------------------
Oven Temperatures: Pre-heat the oven to 200C fan / 220C / 420F / gas 7.
As soon as you put the choux in the oven turn the temperature down to 180C fan / 200C / 390F / gas 6.  For choux puffs and individual Paris brest bake  20 mins.  For the large Paris brest bake for 35-40 mins.
To Dry Out: Turn it down to 120C fan / 140C / 280F / gas 1 for 5-7 mins for puffs, depending on size.  For individual Paris brest shapes dry for 10-15 mins.  For large Paris brest dry out 15-17 mins.
-------------------------------------------------------------------------------------------------

There are some recipes calls for a  drying out time at a higher temperature, and some even asked to poke a hole at the bottom of the puffs so that the it will be completely dry. I am still in my quest for searching for a perfect cream puff pastry, so I can't conclude the best recipe for pate a choux just yet. Will share a better method and pictures once I made the best pate a choux. In the meantime, the above recipe is the best so far. :). It will however, become soft and less crispy after a few hours or after you've added the pastry cream because of the moisture the puffs absorbed but they still tastes delicious! 

Anyways, other than Beard Papa, Levain's creme a la choux is one of the best!! 


As for the custard, I just used 2 tablespoon of custard powder, 2 tablespoon of sugar, 500ml milk, 1 vanilla pod. Boil them on medium heat while stirring till it became thick enough (it's going to take quite sometime) and then let it cool. Cut the puff pastries halfway and pipe the custard cream. 

There are better custard recipes out there which uses egg yolks (custard from scratch) and I am dying to try them very soon! 

To Try - Cream Puff

So I've been crazy for Beard Papa's cream puff, and Levain's. They produces the perfect texture for a choux pastry. I saw this recipe and would like to try it out one day. It's from Yahoo and in case they deleted this entry, I'd better copy it down here.

Beard Papa's makes their choux pastry and pie dough. This is very hard to make so it would not be practical. Their creme filling is probably not too hard to make if you aren't lazy. You might want to get a good recipe for profiteroles, or creme
puffs. You will still have to make choux pastry as this is the base for profiteroles and creme puffs. Here is a good recipe that includes filling.

Pastry Cream

* 3 cups (750 ml) milk
* 3 eggs
* 3/4 cup (175 ml) granulated sugar
* 1/4 cup (50 ml) all-purpose flour
* 1 tbsp. (15 ml) cornstarch
* 2 tbsp. butter (25 ml)
* 1 1/2 tsp. vanilla (7 ml)
* 2 cups (500 ml) whipping cream

1. In heavy saucepan, heat milk until steaming. Meanwhile, in bowl, whisk together eggs, sugar, flour and cornstarch; gradually pour in milk in thin stream, whisking constantly. Return to clean pan. Cook over medium heat, whisking, for 5 minutes or just until boiling; cook, whisking, for 2 minutes longer or until thickened. Remove from heat; stir in butter and vanilla.
2. Pour into bowl; place waxed paper directly on surface to prevent skin from forming. Refrigerate until cool, at least 4 hours. Whip cream, gently fold into pastry cream with spatula just until combined.

Note: Pastry cream can be refrigerated for up to 3 days.

Choux Pastry

* 2 cups (500 ml) water
* 1 cup (250 ml) butter, cubed
* 1/4 tsp. (1 ml) salt
* 2 1/2 cups (625 ml) all-purpose flour
* 8 eggs

Glaze

* 1 egg

1. Line two 17- x 11-inch (45 x 29 cm) baking sheets with parchment paper, or grease and dust with flour. In heavy saucepan, bring half of each of the water, butter and salt to boil over high heat; immediately remove from heat. Add half of the flour all at once; stir vigorously with wooden spoon until mixture comes away from side of pan in smooth ball. Cook over medium heat, stirring constantly, for 4 minutes or until film forms on bottom of pan. Transfer to bowl; stir for 30 seconds to cool slightly. Make well in centre.
2. Using electric mixer, beat in 4 of the eggs, 1 at a time, beating well after each addition. Beat until shiny and pastry holds its shape when lifted. Using pastry bag fitted with 1/4-inch (5 mm) plain tip or with spoon, pipe pastry into 1 1/4-inch (3 cm) round by 3/4-inch (2 cm) high mounds on pans. Glaze: Beat egg with 1 tbsp (15 ml) water; brush half over pastry, flattening tips and making sure glaze doesn’t drip onto pan.
3. Bake in 425 degree F (220 degree C) oven for 20 minutes; rotate trays. Reduce heat to 375 degrees F (190 degrees C); bake for 10 minutes or until golden. With knife, make small hole in bottom of each; bake for 5 minutes. Turn off oven; let stand in oven for 10 minutes to dry. Transfer to rack; let cool. With wooden spoon handle, enlarge hole in each puff. Repeat with remaining choux pastry ingredients and glaze to make 85 puffs in total.
4. Spoon pastry cream into pastry bag fitted with 1/4-inch (5 mm) plain tip. Pipe into hole in each puff, squeezing bag gently until puff is filled with cream. Place on waxed paper-lined baking sheet. (Puffs can be lightly covered with plastic wrap and refrigerated for up to 1 hour.)

As I have stated before, beard papa's uses pie dough as well. If you are feeling a bit adventurous, look for a flaky pie dough recipe and roll them out to thin circles and put them on the choux pastry before baking. This may result in a creme puff very similar to beard papas but will entail much effort. Good luck.

Source(s):

http://creampuffsinvenice.ca/category/choux-pastry/

Wednesday, November 2, 2011

Sales Blog

Haha, ok now I've 3 blogs to manage, not sure which one I will be updating the most. Anyways, I was about to write about Cream Puff and the recipe here but the post was stopped halfway. Will update that later. In the meantime, I've just created a new sales blog!! Haha, I can actually combine both sales blog and the journal, no? But I dont know, it's just that I've just bought a new rubber stamp and I've accidentally wrote that address and it's going to be a permanent sales blog for now :)..


Monday, October 24, 2011

Cakey Affair - Bakes and Orders

I can't remember when was the first time I started baking a cake all by myself without the assistance from my mom or sis or aunt or grandmother, but I remembered once during a school holiday during my teens, I bought a chocolate cake mix with my cousin with hopes of  having our fresh from the oven cake. The cake mix only requires to add oil and egg, place it in a greased cake pan and bake it in the oven. The.cake.did.not.rise. I halted from baking after that, as I was in a boarding school for 2 years. 

Long story short, I still can't remember the starting point of my baking. I did bake blueberry muffins once in a while using Martha Stewarts' recipe somewhere in 2006 or 2007, but it all started at one point after my former housemate, Moodey brought her mom's oven to the house we used to live in Cyberjaya during our undergraduate student years. Thanks Moodey for the inspiration! I will always remember that. ^_^ 

This year has been the most baking work I've ever done in my entire life. I made some of the recipes for numerous number of times with lots of trials and errors (well that is what we have to do in order to get the best result aye?).... and I've started taking orders! 

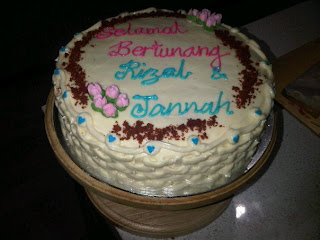
Red Velvet Cupcake/Cake

Bakes


I was introduced with this cake by my sister earlier this year. At that moment, my sister was pregnant, she recently got back after a good 3 years of working in London, and was unemployed since no companies would want to hire a pregnant lady :p. She said she made the best red velvet cupcakes ever, and her cupcakes were a hit back in London when she had this charity sales or something. 

Our first trial was a disaster. I guess it was due to the ingredients. Previously, all of our ingredients especially those baking ingredients would somehow pass the due date. I was a seasonal baker, and there would always be leftovers of the ingredients which will be kept for months before the next baking project. The ingredients we used for the first trial have yet to reach the expiry date, but since it was kept in the refrigerator so long, the stuff kinda absorbed the smell of the fridge, or as we call it "bau peti sejuk". We used icing sugar which was kept for 2 months or so, and our cream cheese frosting tasted "peti sejuk"!  

All of that were history. Hehe. After cupcakes, I tried making a whole cake, and it was a success. I've altered the original recipe by reducing the sugar amount and adding a very secret ingredient. Haha. I am still in the quest of searching for the best cream cheese frosting which will be easy to pipe and won't melt easily and most importantly, not too sweet. Most recipes will just ask to add more sugar to make it stiffer. 

Orders

These are some of the orders I've made so far.. My very first customer was my former schoolmate, Amin who requested 2 cakes for his sister's engagement.


And a few other orders, which basically are from my family and some close friends who've tried it during my Open House last Syawal.


And thanks to my friend, Mawaddah who have yet to try my red velvet, but she promoted me to her  officemate for  graduation themed cupcakes. This was my first time working with fondant though. It was a hard work!! 


I also  made a few extras for a friend who's leaving on a jet plane...

and a dear friend's graduation.


Rainbow Cake

Bakes


My first encounter of Rainbow Cake would be during a friend's wedding weeks before Ramadhan. I really like the idea of Rainbow Cake, it was colourful and would cheer anybody's day. I wasn't really interested of making one, not until my sister BBMed me another rainbow cake made by her friend's sister whilst she was having breakfast at her friend's place. I just realized that making rainbow cake is not that difficult, I just need to find a good pound cake recipe, or butter cake recipe, or any vanilla cake recipe and add colours to them. The only hassle is the need of baking it layer by layer. I tried my first Rainbow Cake during Open House last Syawal as well.. 

Orders

A friend's friend saw the above photo and decided to order one from me as well. I'm not sure if she liked the cake or not, but hopefully she liked it. :-S. The white frosting is cream cheese frosting! 


The Best Chocolate Cake You've Ever Ate

Bakes


I remembered the first time I made this cake somewhere in early 2010 for a friend's birthday, I followed the exact same recipe as the one here. The recipe was supposed for a 9x13 inch pan but I made it in a 8 inch round pan. It should be good on it's own, but I decided to cut the cake to half so that I can add the chocolate frosting in between. The cake was a very dense cake, hence upon cutting it in between it collapsed. I managed to save it by adding frosting in between and tried to put the cake to it's place and make it back to a rounded shape and add frosting on top of it. My friends actually liked the cake and they can't believe I actually baked it myself. :p

It was long after that I tried making the recipe again around this year, but this time around I changed the method, instead of using melted butter, I creamed the butter with reduced sugar. It was a hit! I made it for my nephew's Akikah, and most of the guests loved it! It was in bite sizes hence the love affair by the guests. The cake was very soft after baking though, so I had to make it to bite sizes and had to present it as the above picture so that it'll look presentable. It would very difficult to make the cake in one piece, because as I turned it over it would break! :-S. I prefer to bake this during big events as it can cater for quite a number of guests.


Ah, I guess that's all for my cakey affair.. I have yet to try more recipes, but for now I guess I'll stick to these few.. My next trial project would be Lemon Poppy Seed Cupcakes. Can't wait!!


Friday, October 21, 2011

Yeasty Affair 2 - Ensaimadas de Mallorca

Previously we were in France, now let's fly to Majorca Island in Spain to try their yummy breakfast treats. Spiral bread!!


Anyways, Ayah gave me a 1 foot tile for me to work with my dough. I initially wanted to just use the existing table top but it was hard to clean it up before working the dough and after work (It will need at least 3 times of wiping for the before work : one with soap, the next few times with kitchen towel + water, and the next one with a dry kitchen towel and another 3 times for cleanup! OMG). Mak asked me to cover the table top with huge clear plastic while I knead the dough but I find it cumbersome as the plastic tends to stick on the dough. I am quite happy with this tile.This was actually remnants of the tile we used for a different part of the kitchen when it was in renovation earlier this year.


Anyways, back to Ensaimadas. The word "saim" actually originated from light pork lard. Better be careful when u see this bread while in Majorca or anywhere else. They might contain lard....

As for this recipe, the book only says use butter. The lard was actually used for the glazing. The bread itself uses only sunflower oil. Okay let's get to the recipe..

Ingredients

225 g white bread  flour (I just used Tepung Gandum Cap Sauh, my faveret!)
1/2 tsp salt
50 g caster sugar
15 g fresh yeast (I used 1 packet mauripan dry yeast, 11 g)
75 ml lukewarm milk
1 egg
30ml/2 tbsp sunflower oil
50 g butter, melted
Icing sugar for dusting

1. This time around, I made the dough for the first rising the night before so that I wont be in a rush to prepare every thing in one morning. Sift the flour, salt and caster sugar together and then make a well in the centre. 


2. Cream the yeast with the milk. Pour into the centre of the flour mixture and then sprinkle a little of the flour over the top of the liquid. Leave in a warm place for about 15 minutes or until frothy. 

3. Beat the egg and sunflower oil together, add to the flour mixture and mix to a smooth dough. 

4. Turn out on to a lightly floured surface and knead for 8-10 minutes until smooth and elastic. This time around I still use the electric mixer for the kneading, the same method like the previous entry. Place in a lightly oiled bowl, cover with cling film and leave in a warm place for an hour or until doubled in bulk. (Since I prepared the dough the night before, I left it in a refrigerator for about 8 hours so that it will rise slowly overnight and doubled the size by the next morning.)

5. Turn out the dough on floured surface and knock it back. (My dough for the first rising was cold, so I had wait till it became to room temperature before knocking it back). Then, divide the dough into 16 equal pieces, and shape them into thin ropes around 38cm/15in long.

I asked my 7 years old nephew to capture the picture, hence the lower eye view hehe. And look at the brown tile I use for my bread making! Lovin it.

6. Pour the melted butter onto a plate and dip the ropes into the butter to coat.

 7. On the baking sheets, curl each rope into a loose spiral, spacing them well apart. Tuck the ends under to seal. Cover with lightly oiled cling film and leave to rise in a warm place for around 45 minutes until doubled in size. 
8. Preheat the oven to 190 degrees C / 170 degrees C fan assisted. Brush the rolls with water and dust with icing sugar. Bake for 10 minutes or until light golden brown. Cool on a wire rack. Dust again with icing sugar and serve warm.